【Unity】簡単にFadeIn,FadeOutを実装
コード
using System.Collections;
using System.Collections.Generic;
using UnityEngine;
using UnityEngine.UI;

public class Fade : MonoBehaviour
{
    [SerializeField, Header("フェードスピード")] float fadeSpeed;

    Image image;
    float alpha;

    // Start is called before the first frame update
    void Start()
    {
        image = GetComponent<Image>();
        alpha=image.color.a;
    }

    // Update is called once per frame
    void Update()
    {
        if (Input.GetKeyDown(KeyCode.A))
        {
            StartCoroutine(FadeOut());
        }
        if (Input.GetKeyDown(KeyCode.S))
        {
            StartCoroutine(FadeIn());
        }
    }

    IEnumerator FadeOut()
    {
        while (alpha>0)
        {
            image.color = new Color(1,1,1,alpha);
            alpha -= fadeSpeed*Time.deltaTime;
            yield return null;
        }
    }
    IEnumerator FadeIn()
    {
        while (alpha < 1)
        {
            image.color = new Color(1, 1, 1, alpha);
            alpha += fadeSpeed*Time.deltaTime;
            yield return null;
        }
    }
}
実行結果

【Unity】Gameビューにグリッドを表示
やりたいこと
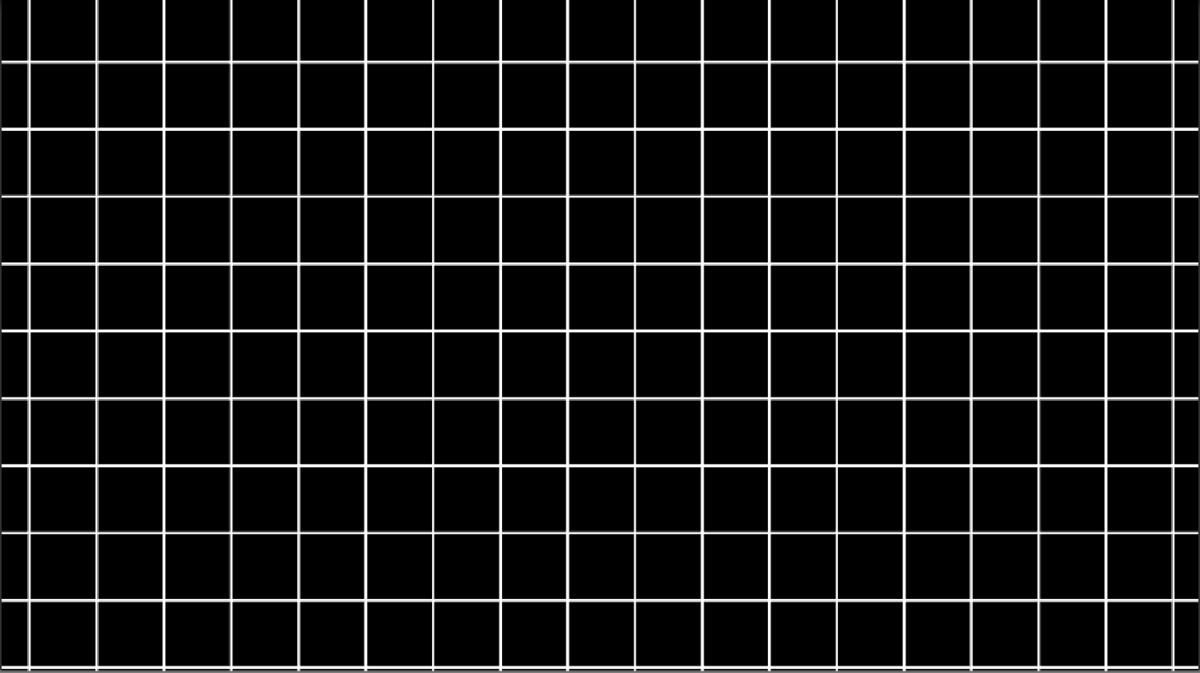
こんな感じにGameビューにグリッドを表示したい。

サンプルコード
using UnityEngine;

[RequireComponent(typeof(MeshFilter)),RequireComponent(typeof(MeshRenderer))]
public class LineGrid : MonoBehaviour
{
    Vector3[] verts;    //ポリゴンの頂点を入れる
    int[] triangles;    //三角形を描く際に、頂点の描画順を指定する
    GameObject camera;  //カメラ

    [SerializeField,Header("使用するMaterial")] Material material;
    [SerializeField,Header("大きさ")] Vector2Int size;
    [SerializeField,Header("線の太さ")] float lineSize;

    void Start()
    {
        //カメラを取得
        camera = GameObject.FindGameObjectWithTag("MainCamera");
    }

    // Update is called once per frame
    void Update()
    {
        CreateGlid();

        //カメラをグリッドの中心へ(必要ない場合はコメントアウトしてください)
        camera.transform.position = new Vector3((float)size.x / 2, ((float)size.y / 2) - 0.1f, -10);
    }

    void CreateGlid()
    {
        //新しいMeshを作成
        Mesh mesh = new Mesh();

        //頂点の番号をsize分確保、縦横の線が一本ずつなくなるので+2を入れる、一本の線は頂点6つで表示させるので*6
        triangles = new int[(size.x + size.y + 2) * 6];
        //頂点の座標をsize分確保
        verts = new Vector3[(size.x + size.y + 2) * 6];

        //頂点番号を割り当て
        for (int i = 0; i < triangles.Length; i++)
        {
            triangles[i] = i;
        }


        //何回for分が回ったかをカウントさせる
        int x = 0, y = 0;

        //縦線
        for (int i = 0; i < (size.x + 1) * 6; i += 6)
        {
            verts[i]     = new Vector3(x, 0, 0);
            verts[i + 1] = new Vector3(x, size.y, 0);
            verts[i + 2] = new Vector3(lineSize + x, size.y, 0);
            verts[i + 3] = new Vector3(lineSize + x, size.y, 0);
            verts[i + 4] = new Vector3(lineSize + x, 0, 0);
            verts[i + 5] = new Vector3(x, 0, 0);
            x++;
        }

        //横線
        for (int i = (size.x+1) * 6; i < (size.x + size.y + 2) * 6; i+=6)
        {
            verts[i]   = new Vector3(0,y,0);
            verts[i+1] = new Vector3(size.x+lineSize, y, 0);
            verts[i+2] = new Vector3(0, y - lineSize, 0);
            verts[i+3] = new Vector3(size.x + lineSize, y, 0);
            verts[i+4] = new Vector3(size.x + lineSize, y - lineSize, 0);
            verts[i+5] = new Vector3(0, y - lineSize, 0);
            y++;
        }

        //作った頂点番号、座標データを作成したmeshに追加
        mesh.vertices = verts;
        mesh.triangles = triangles;

        //再計算()
        mesh.RecalculateBounds();
        mesh.RecalculateNormals();

        //再計算後に完成したMeshを追加
        GetComponent<MeshFilter>().mesh = mesh;
        //設定したMaterialを反映
        GetComponent<MeshRenderer>().material = material;
    }
}
コード解説1
      triangles = new int[(size.x + size.y + 2) * 6];
        verts = new Vector3[(size.x + size.y + 2) * 6];
なぜここで(+2)や(*6)をしているかの解説です。
サンプルコードで Vector2Int sizeが宣言されていますがこれはグリッドのマス目数を表いしています。
例えば(+2)をせずに処理をしたとするとVector2Intの中身がx=2,y=2の場合。 この赤の線のところが描画されなくなってしまいます。
コード解説2
      //何回for分が回ったかをカウントさせる
        int x = 0, y = 0;

        //縦線
        for (int i = 0; i < (size.x + 1) * 6; i += 6)
        {
            verts[i]     = new Vector3(x, 0, 0);
            verts[i + 1] = new Vector3(x, size.y, 0);
            verts[i + 2] = new Vector3(lineSize + x, size.y, 0);
            verts[i + 3] = new Vector3(lineSize + x, size.y, 0);
            verts[i + 4] = new Vector3(lineSize + x, 0, 0);
            verts[i + 5] = new Vector3(x, 0, 0);
            x++;
        }

        //横線
        for (int i = (size.x+1) * 6; i < (size.x + size.y + 2) * 6; i+=6)
        {
            verts[i]   = new Vector3(0,y,0);
            verts[i+1] = new Vector3(size.x+lineSize, y, 0);
            verts[i+2] = new Vector3(0, y - lineSize, 0);
            verts[i+3] = new Vector3(size.x + lineSize, y, 0);
            verts[i+4] = new Vector3(size.x + lineSize, y - lineSize, 0);
            verts[i+5] = new Vector3(0, y - lineSize, 0);
            y++;
        }
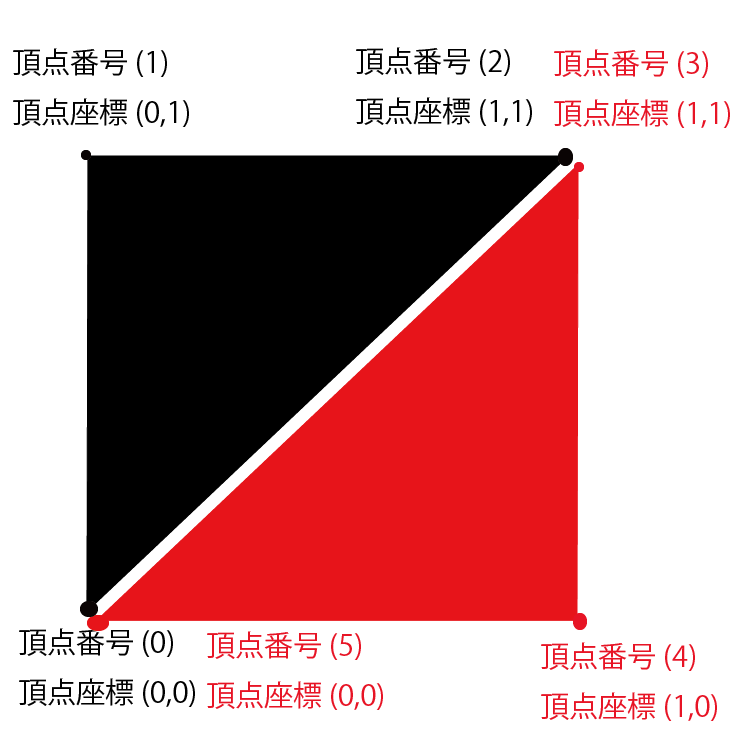
ここでは頂点座標を決めています。
頂点を下の図のように配置すると四角形が形成されます。

あとはこの四角形のx,yの長さを決めてあげれば線のように描画できます。
完成

【Unity】三角関数で円運動
Script
  [SerializeField, Header("半径")]
    float radius;

    [SerializeField, Header("θのやつ")]
    float rotation;

    void Update()
    {
        TrigonometricFunction();
    }

    void TrigonometricFunction()
    {
        transform.position = new Vector3(Mathf.Sin(rotation), Mathf.Cos(rotation),0)*radius;
    }
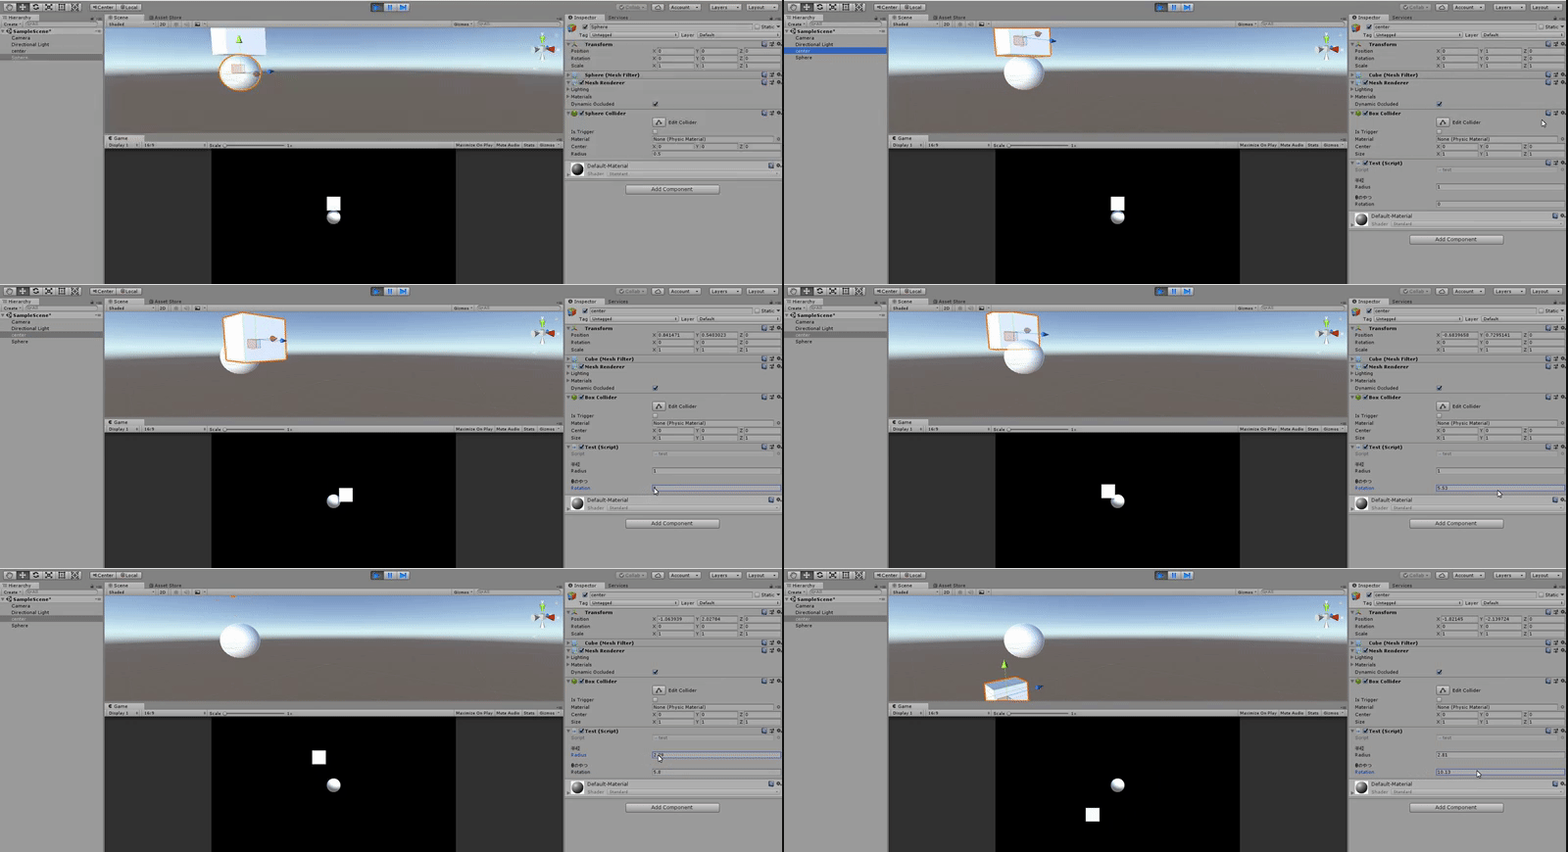
動作

【Unity】円形状の移動制限のかけ方
Script
```C#:test
public GameObject centerObj; //中心となるオブジェクト(ゲームオブジェクトじゃなくても中心点がわかればOK)
[SerializeField, Header("半径")]
float radius;
[SerializeField, Header("速さ")]
float speed;
// Update is called once per frame
void Update ()
{
Move();
Restriction();
}
void Move()
{
//手動で動かせるように(円形の移動制限には関係ありません)
transform.position += new Vector3(Input.GetAxis("Horizontal") *speed*Time.deltaTime, Input.GetAxis("Vertical") * speed * Time.deltaTime, 0);
}
///
/// 円形の移動制限
///
void Restriction()
{
//自身と円形に移動制限させたい位置の中心点との距離を測り半径以上になっていれば処理
if (Vector3.Distance(transform.position,centerObj.transform.position)>radius)
{
//中心点から自身までの方向ベクトルを作る
Vector3 nor=transform.position-centerObj.transform.position;
//作った方向ベクトルを正規化する
nor.Normalize();
//方向ベクトル分半径に移動させる
transform.position = nor * radius;
}
}
```
どんな場合に使うの?
自分は自作バーチャルパッドを作った時に使いました
【Unity入門】Scene遷移しても値を保持する方法
*一番簡単に実装するなら 一番簡単にこの機能を実装するならStaticClassを作るのが一番楽だと思います。
*StaticClass
public static class test
{
    public static int num;
    static float fl;
    static string str;
    static char ch;

    public static void SetInt()
    {

    }
}
StaticClassの注意点としてMonoBehaviourを継承できないのでVectorなどは保持できないので注意
*StaticClassにアクセスするには 宣言などは一切必要なく
//これで関数を呼び出せます呼び出せます
//クラス名.関数名();
//上のスクリプトを例にすると
test.SetInt();
//変数も同じ
test.num;
これだけでアクセスして値を保存できます。
*デメリット どこからでもアクセスできるので複数人で作る場合管理が難しい
【Unity】3D座標を2D座標に直す方法
*3D座標を2D座標に変換 オブジェクトのxとyの値だけを使えばそれは2Dの座標なのでは?と最初自分は思っていましたがCameraの位置や角度を変えるとうまくいかなくなるのでそれらに対応したものを作っていきましょう。
*Script公開
    public GameObject obj;          //3D座標から2D座標に変換したいオブジェクト
    public GameObject confirmation; //座標がちゃんと変換されているか確認用

    void Start()
    {
        //カメラを平行投影にする ここ一番重要!透視投影のままだとうまく座標変換できません
        Camera.main.orthographic = true;
    }

    // Update is called once per frame
    void Update()
    {
        confirmation.transform.position = Change2DPos(obj);
    }

    Vector2 Change2DPos(GameObject obj3D)
    {
        //Camera.mainになっていますが設定したいCameraがあれば変更してくさい。
        Vector2 pos2D=Camera.main.ViewportToWorldPoint(Camera.main.WorldToViewportPoint(obj3D.transform.position));
        return pos2D;
    }
}
Script的にはこうなります。
変換部分の解説
     //一度3Dのオブジェクト座標をビューポート座標に変換。
     var pos1= Camera.main.WorldToViewportPoint(obj3D.transform.position);
     //ここのZの値はカメラのZ座標が入るので一度0にします(ここはご自由に変えてください)
     pos1.z=0;
     //ビューポート変換した座標をワールド座標に直します。
     var pos2 =Camera.main.ViewportToWorldPoint(pos1);
これらのことを一行で書くと最初に書いたコードになります(Z座標とくに考慮してませんが)
*終わり なにか質問やここ間違ってるなどありましたらコメントください。
【Unity】なぜGetComponentを毎フレーム取得することが推奨されていないのか
*毎フレームGetComponent よくGetComponentは毎フレームやることはよろしくないという話を聞きますがなぜダメなのでしょうか?
*試してみよう! 今回は二つのScriptを用意しました
片方は先にComponent取得してから10万回Transform.positionにvector(0,0,0)を入れる
  private void Start()
    {
        Transform t=GetComponent<Transform>();
        for (int i = 0; i < 100000; i++)
        {
            t.position = new Vector3(0,0,0);
                }
       }
もう片方は10万回GetComponetして10万回Transform.positionにvector(0,0,0)を入れる
    private void Start()
    {
        for (int i = 0; i < 100000; i++)
        {
            GetComponent<Transform>().position = new Vector3(0,0,0);
        }
    }
*結果

2倍近く差が出てるんですけど… 今回は10万回で検証しましたがこれが毎フレーム実行されたとしても2倍近く処理が無駄ってことですね。 仕様上仕方がない理由以外ではUpdateでGetComponentをするこはよろしくなさそうですね。